Edwardian Corset: Final project
Thank goodness I wrote a post about fitting this back around when I actually made it, because I put down some of the basic notes about it at the time. As per usual, if I don’t write the blog post promptly, I forget most of the construction details and pain points.
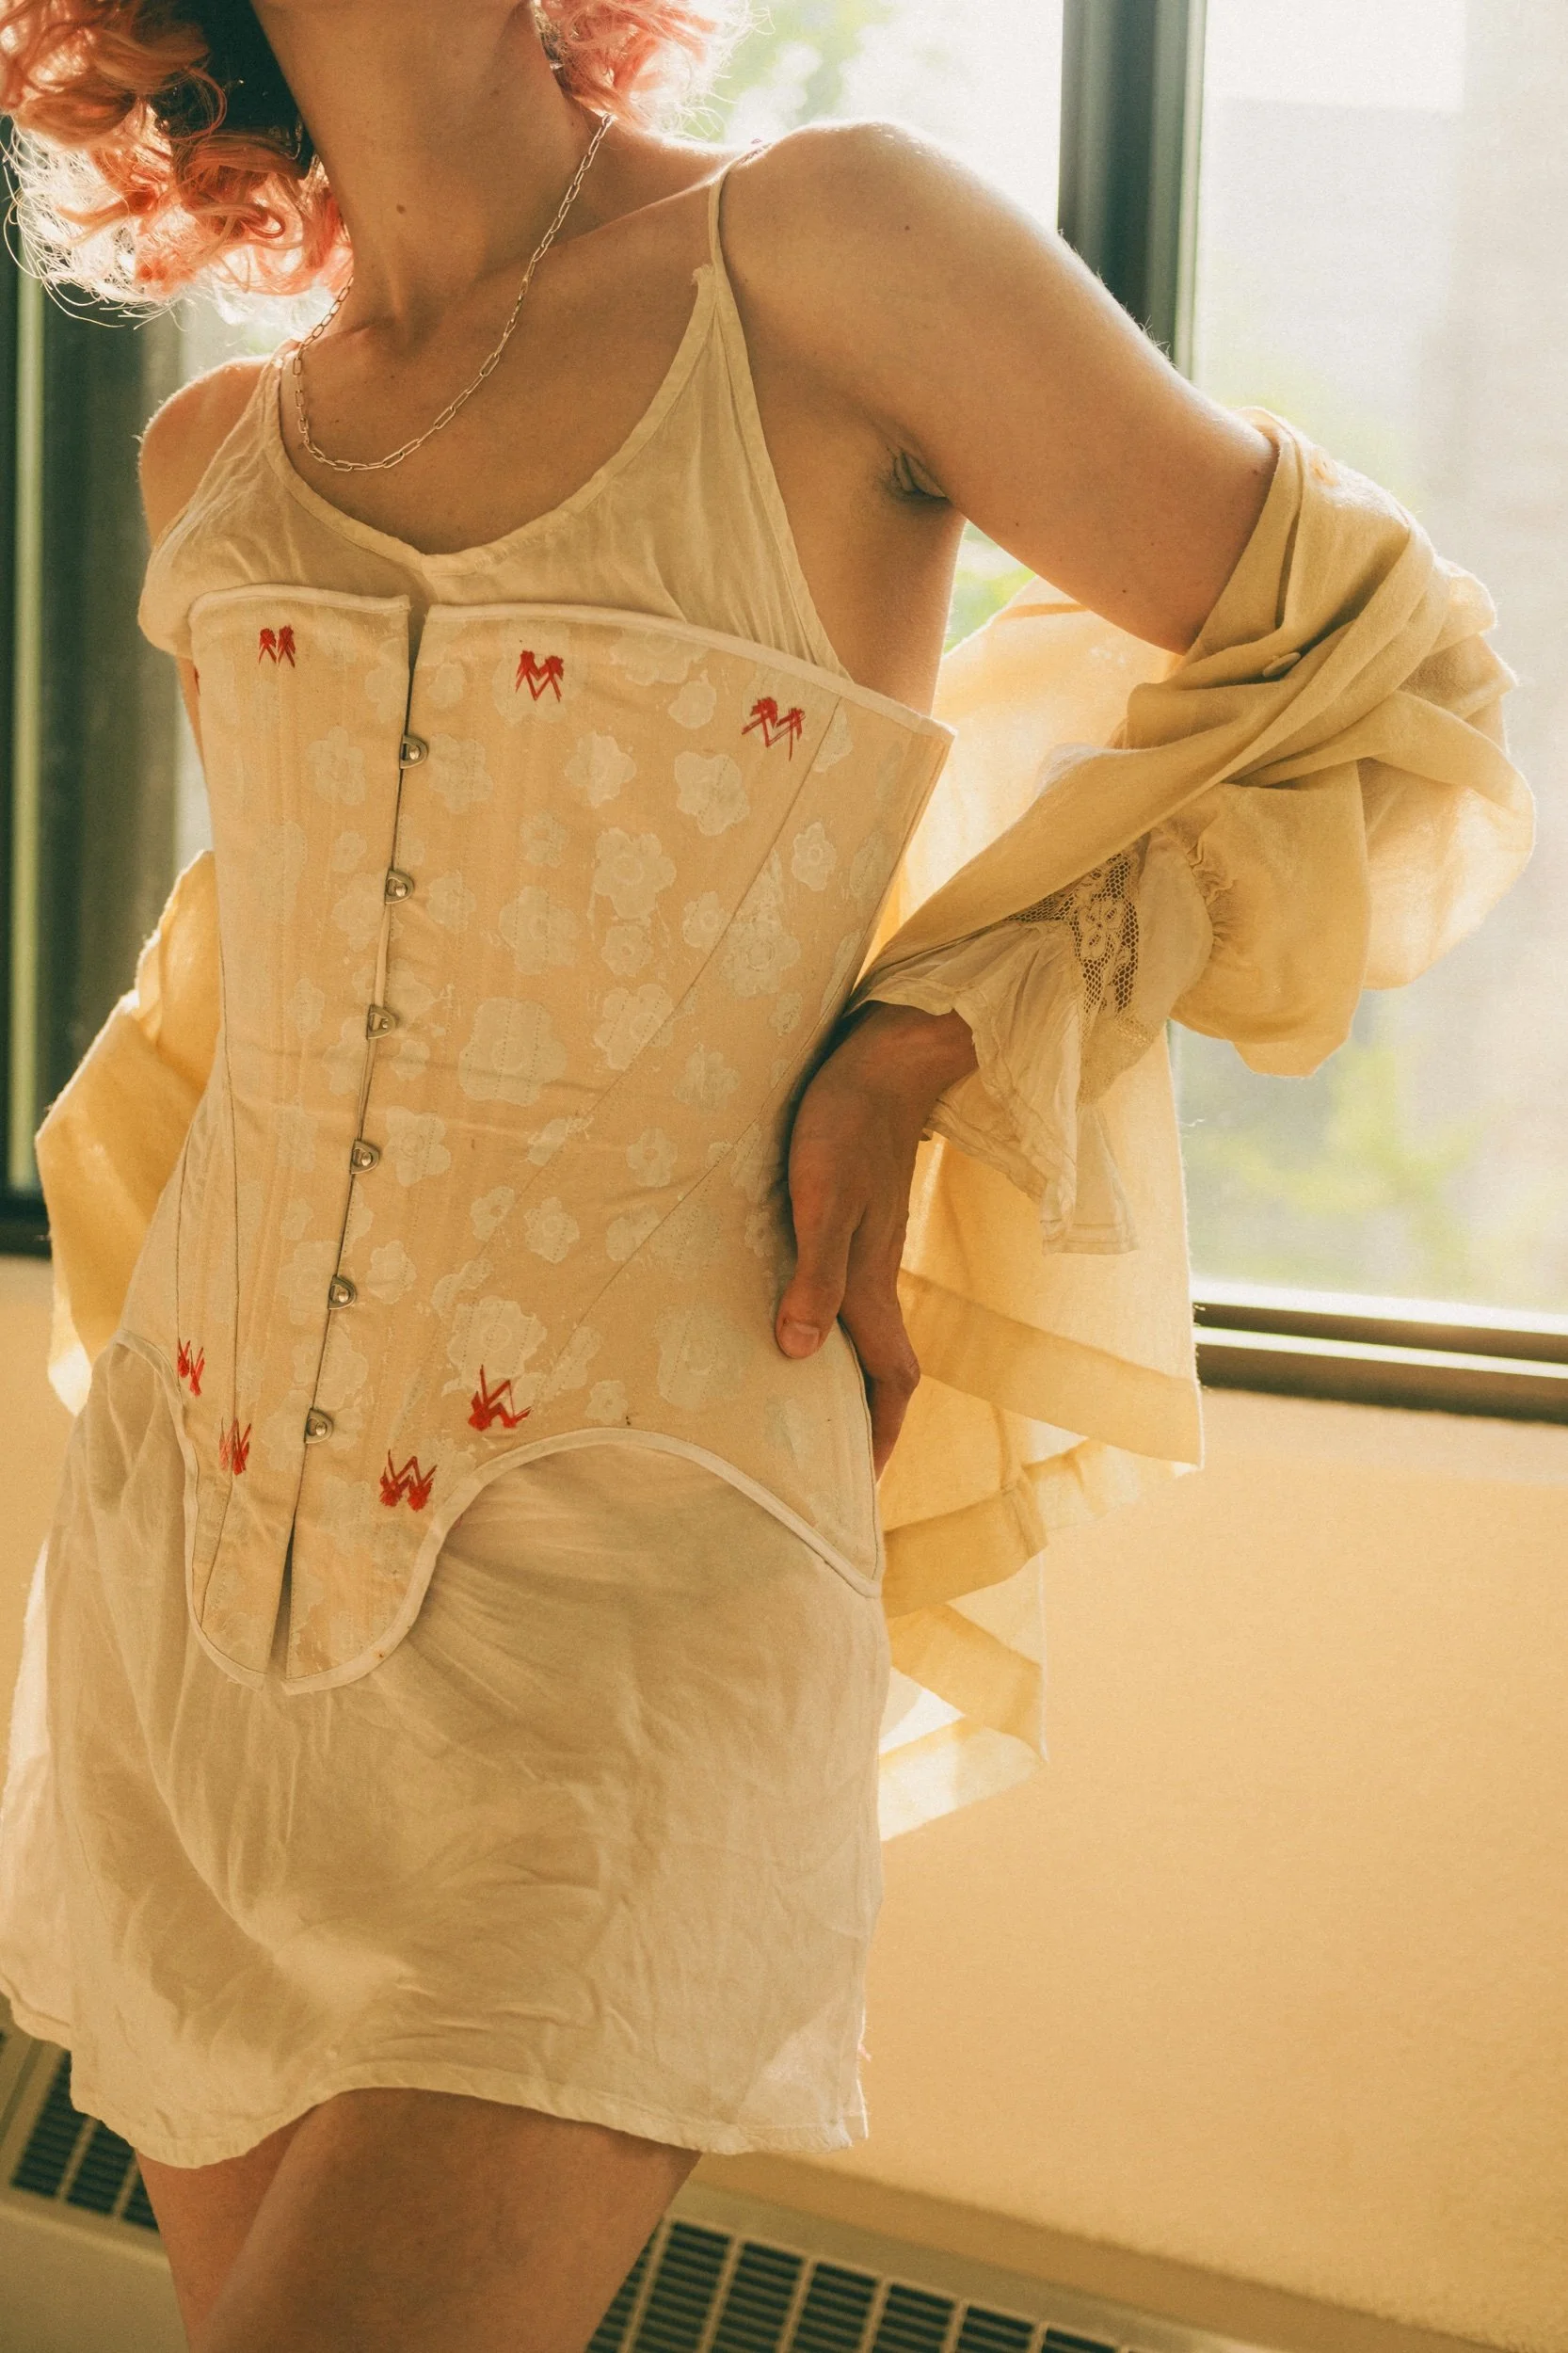
Having fit the pattern in ticking, the actual garment I made with herringbone coutil from Farthingales (as the bulk of this project was supplied from. Their resources were very helpful and made shopping from them reassuring and easy). I purchased a beige coutil, but wanted a bit more visual interest, so I hand-printed a floral pattern on the entire length of fabric.
My fabric stamp I designed on paper, trying to create a smooth repeat of a scattered pattern. I carved a 4x5.5” Speedy-cut lino stamp block and printed with Speedball fabric screen printing ink in white. I used a paint roller from the hardware store instead of a brayer to apply the ink to the stamp and I pressed it onto the fabric by stepping on the stamp as I went along (fancy!).
Having tested assembly once in fitting, I moved directly into assembly in the coutil. This was mostly because I lost the pattern pieces I had cut out to make a second mock up. I don’t think it’s any the worse for it, and the mods to the pattern were minor (basically just adding a cm of width around the bottom of my ribs).
The pattern is a single layer corset and the bones don’t align with seams, so the seams are felled down. Felling in coutil: kind of rocks!! I love pressable, stiff fabrics for real. Of course, this meant being committed to the shape - no adjustments after phase one assembly.
Learning to insert the back steels and the busk was fun, and more intuitive than reading about it felt. I love just knowing there’s all that steel in there.
To make sure the boning channels were lovely and that I could top-stitch them from the outside but not miss any of the edges, I hand basted the channels before sewing for real. I used the sharpest long sharps I could but BOY did the crouton blunt quickly with the hand sewing, so this part was a paiiiinnnn. Worth it though, I think? Boning channels are clean and well-secured throughout. They are made with 2” strips of Farthingale’s “corset fabric”. I used german plastic in the channels and an emory board and the front step to sand the ends smooth.
For the top and bottom I simply finished with thrifted bias tape. All that that left was finishing the boning channels with flossing. This is technically still a work in progress since… well, I like doing the decorative embroidery at Victorian sewing circle, but Victoria sewing circle is also the place to wear the corset! I’ve done the flossing with an embroidery silk I picked up from kijiji a bit ago - I got it for mending purposes, but the gloss and strength is perfect for this. Because it’s a thrift find, I don’t have enough of any one colour to do it all, so I started with the light pink, moved to the magenta, and will eventually incorporate purple if I make it that far. I’d like to! This was a nice resource on flossing: Sidney Eileen and I used basic flossed crossing.
Pattern: Black Snail Edwardian Corset
My measurements: 34” bust, 30.5” underbust, 30” waist, 38” hips
Size made: 38/12 (29” waist)
Mods: added a cm around my lower ribs and up, tapering to nothing
Fabrics and notions: From Farthingales: Grommet setting kit size 00, 3/4 unbleached cotton twill tape, 11 mm spring steel bones, 7 mm german plastic bones, corset lacing kit, 13 in wide busk, herringbone coutil. Thrifted: bias tape, silk embroidery floss Art supply store: Speedy-cut lino block (4x5.5”), lino cut tools, white Speedball screenprinting ink Hardware store: paint roller
Next time: Get some boning tape with your supply order!


