Butterick 7329: clever 50s construction
This one was fast. And rewarding.
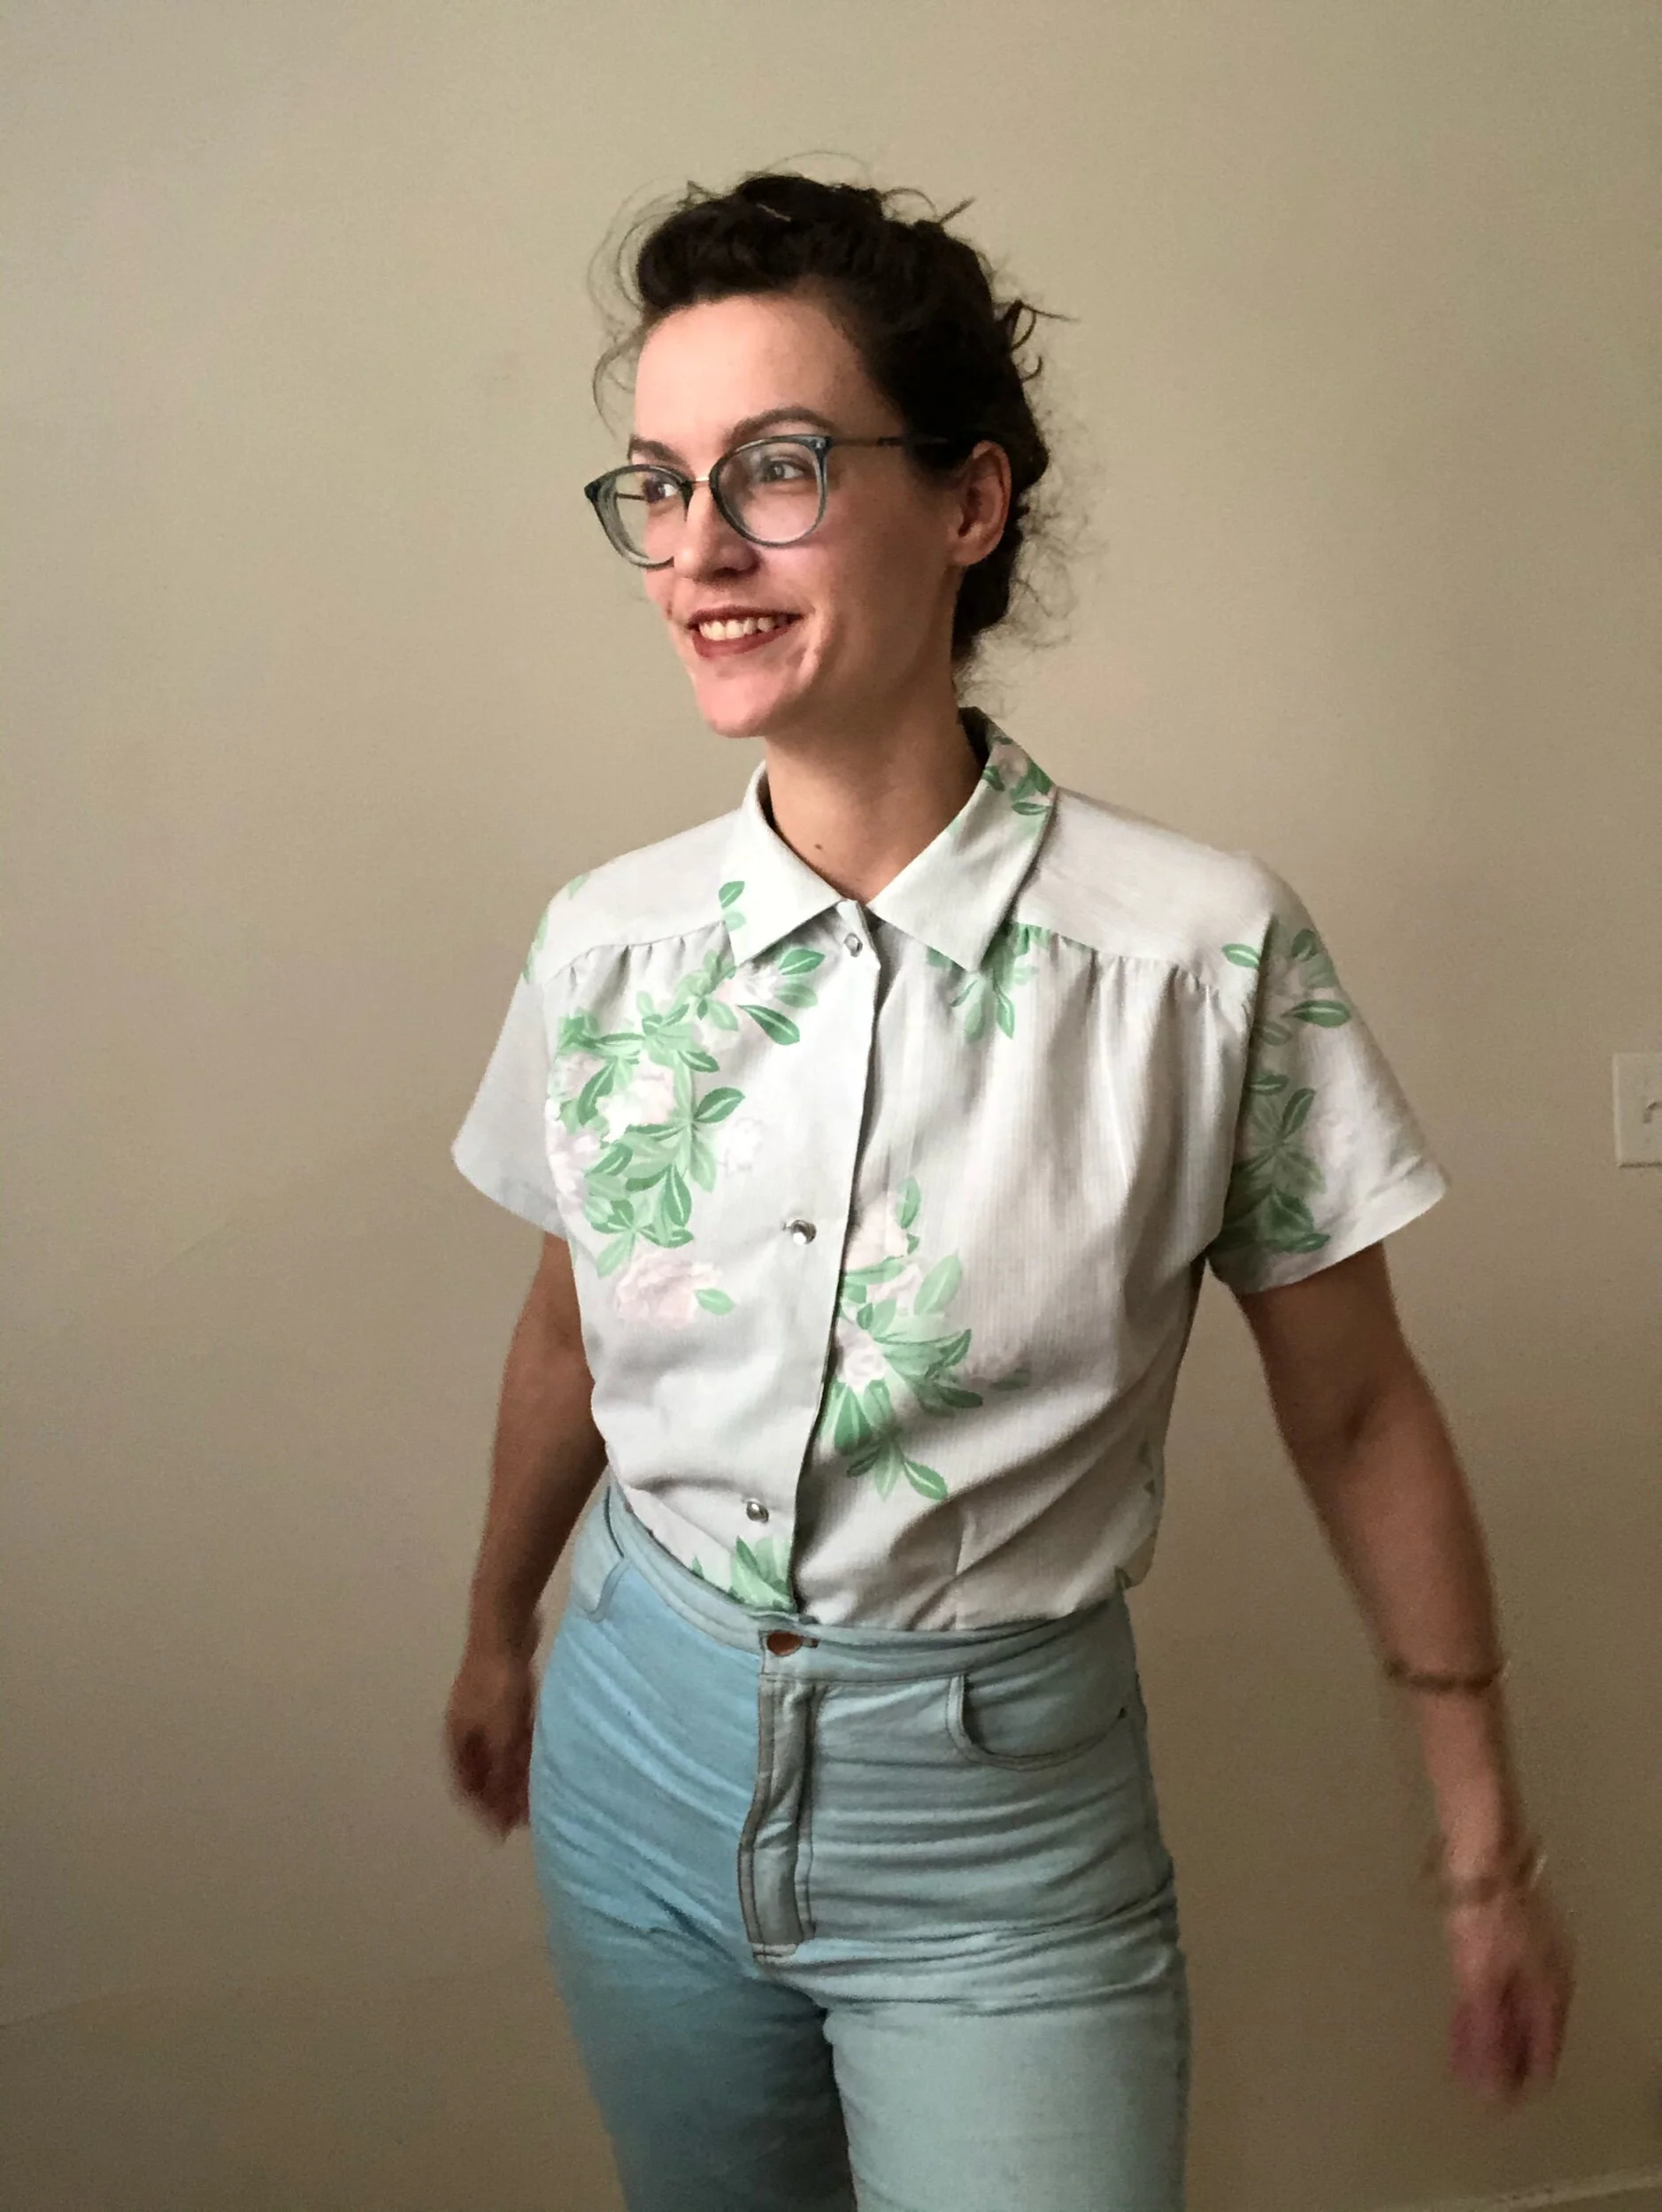
The pattern: Butterick 7329, a 1950s blouse acquired via pattern trace n trade on Facebook, via the v. cool @stitchmaven. It’d caught my eye among her patterns because I couldn’t quite picture how the front yoke and sleeves were cut in one. Well, they’re also cut on with the back, which is just a truly loveable design.
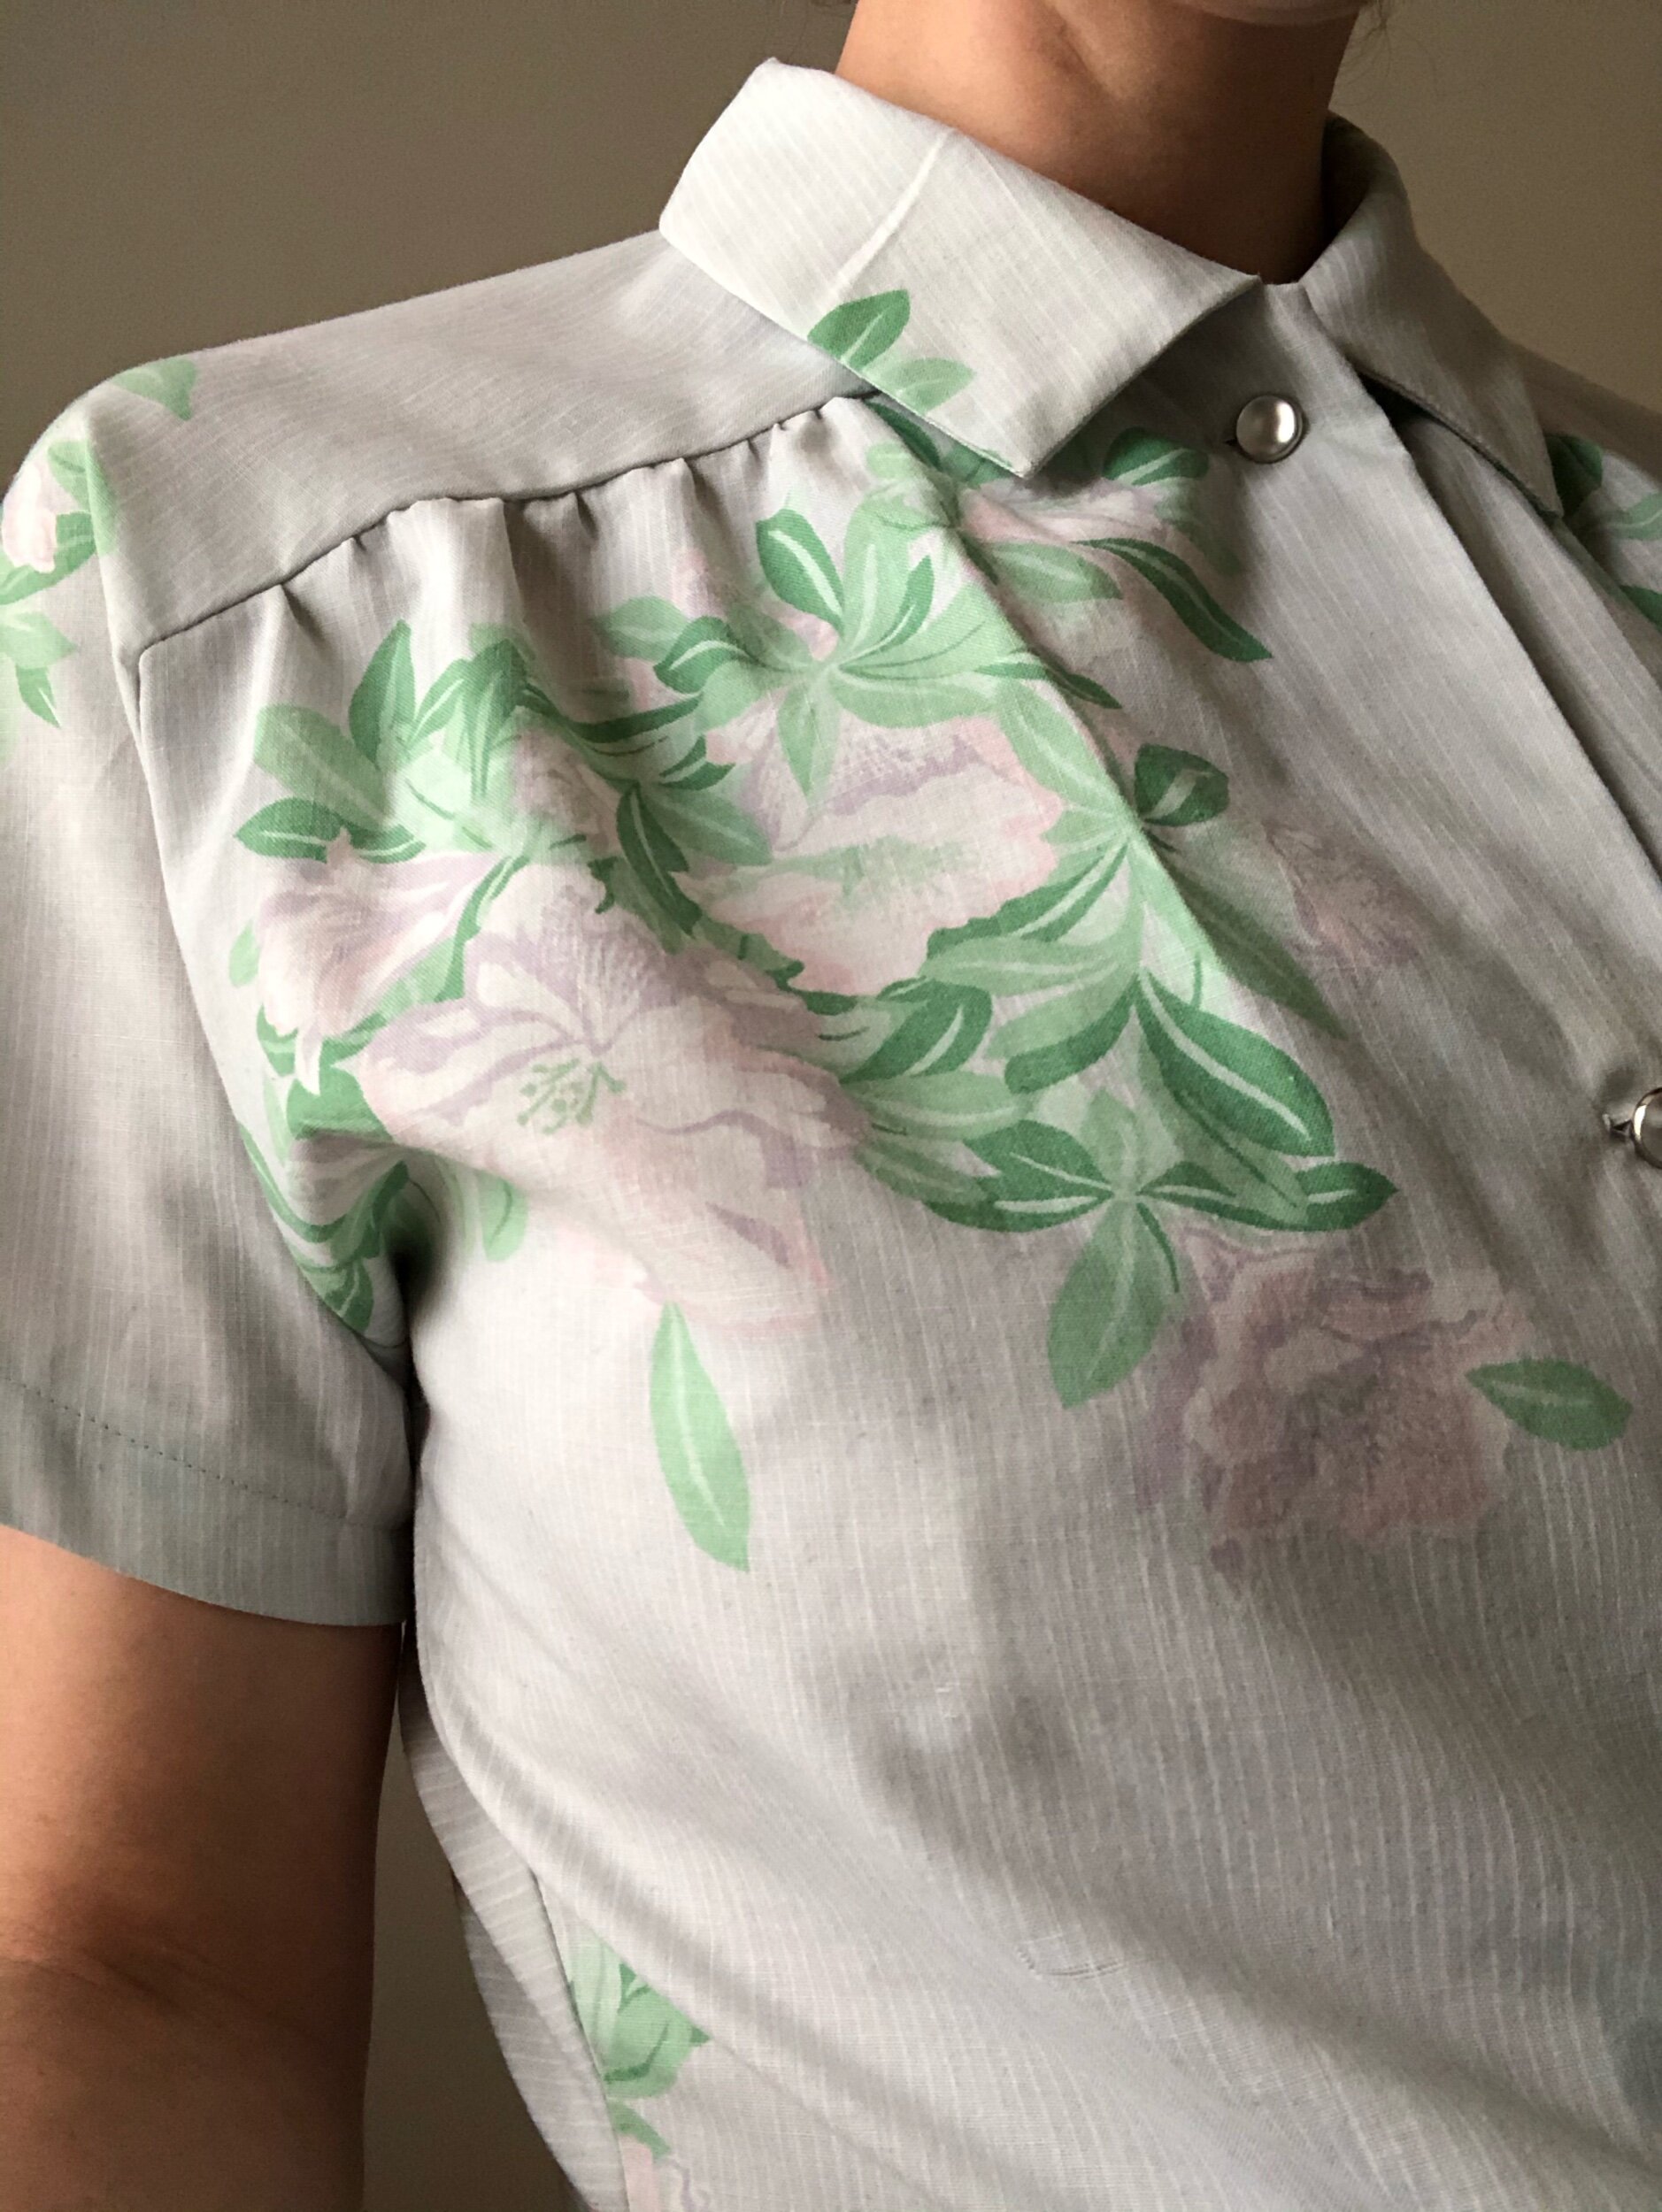
yoke/sleeve/buttons closeup
They really knew how to do interesting shirt details in the 50s, dude.

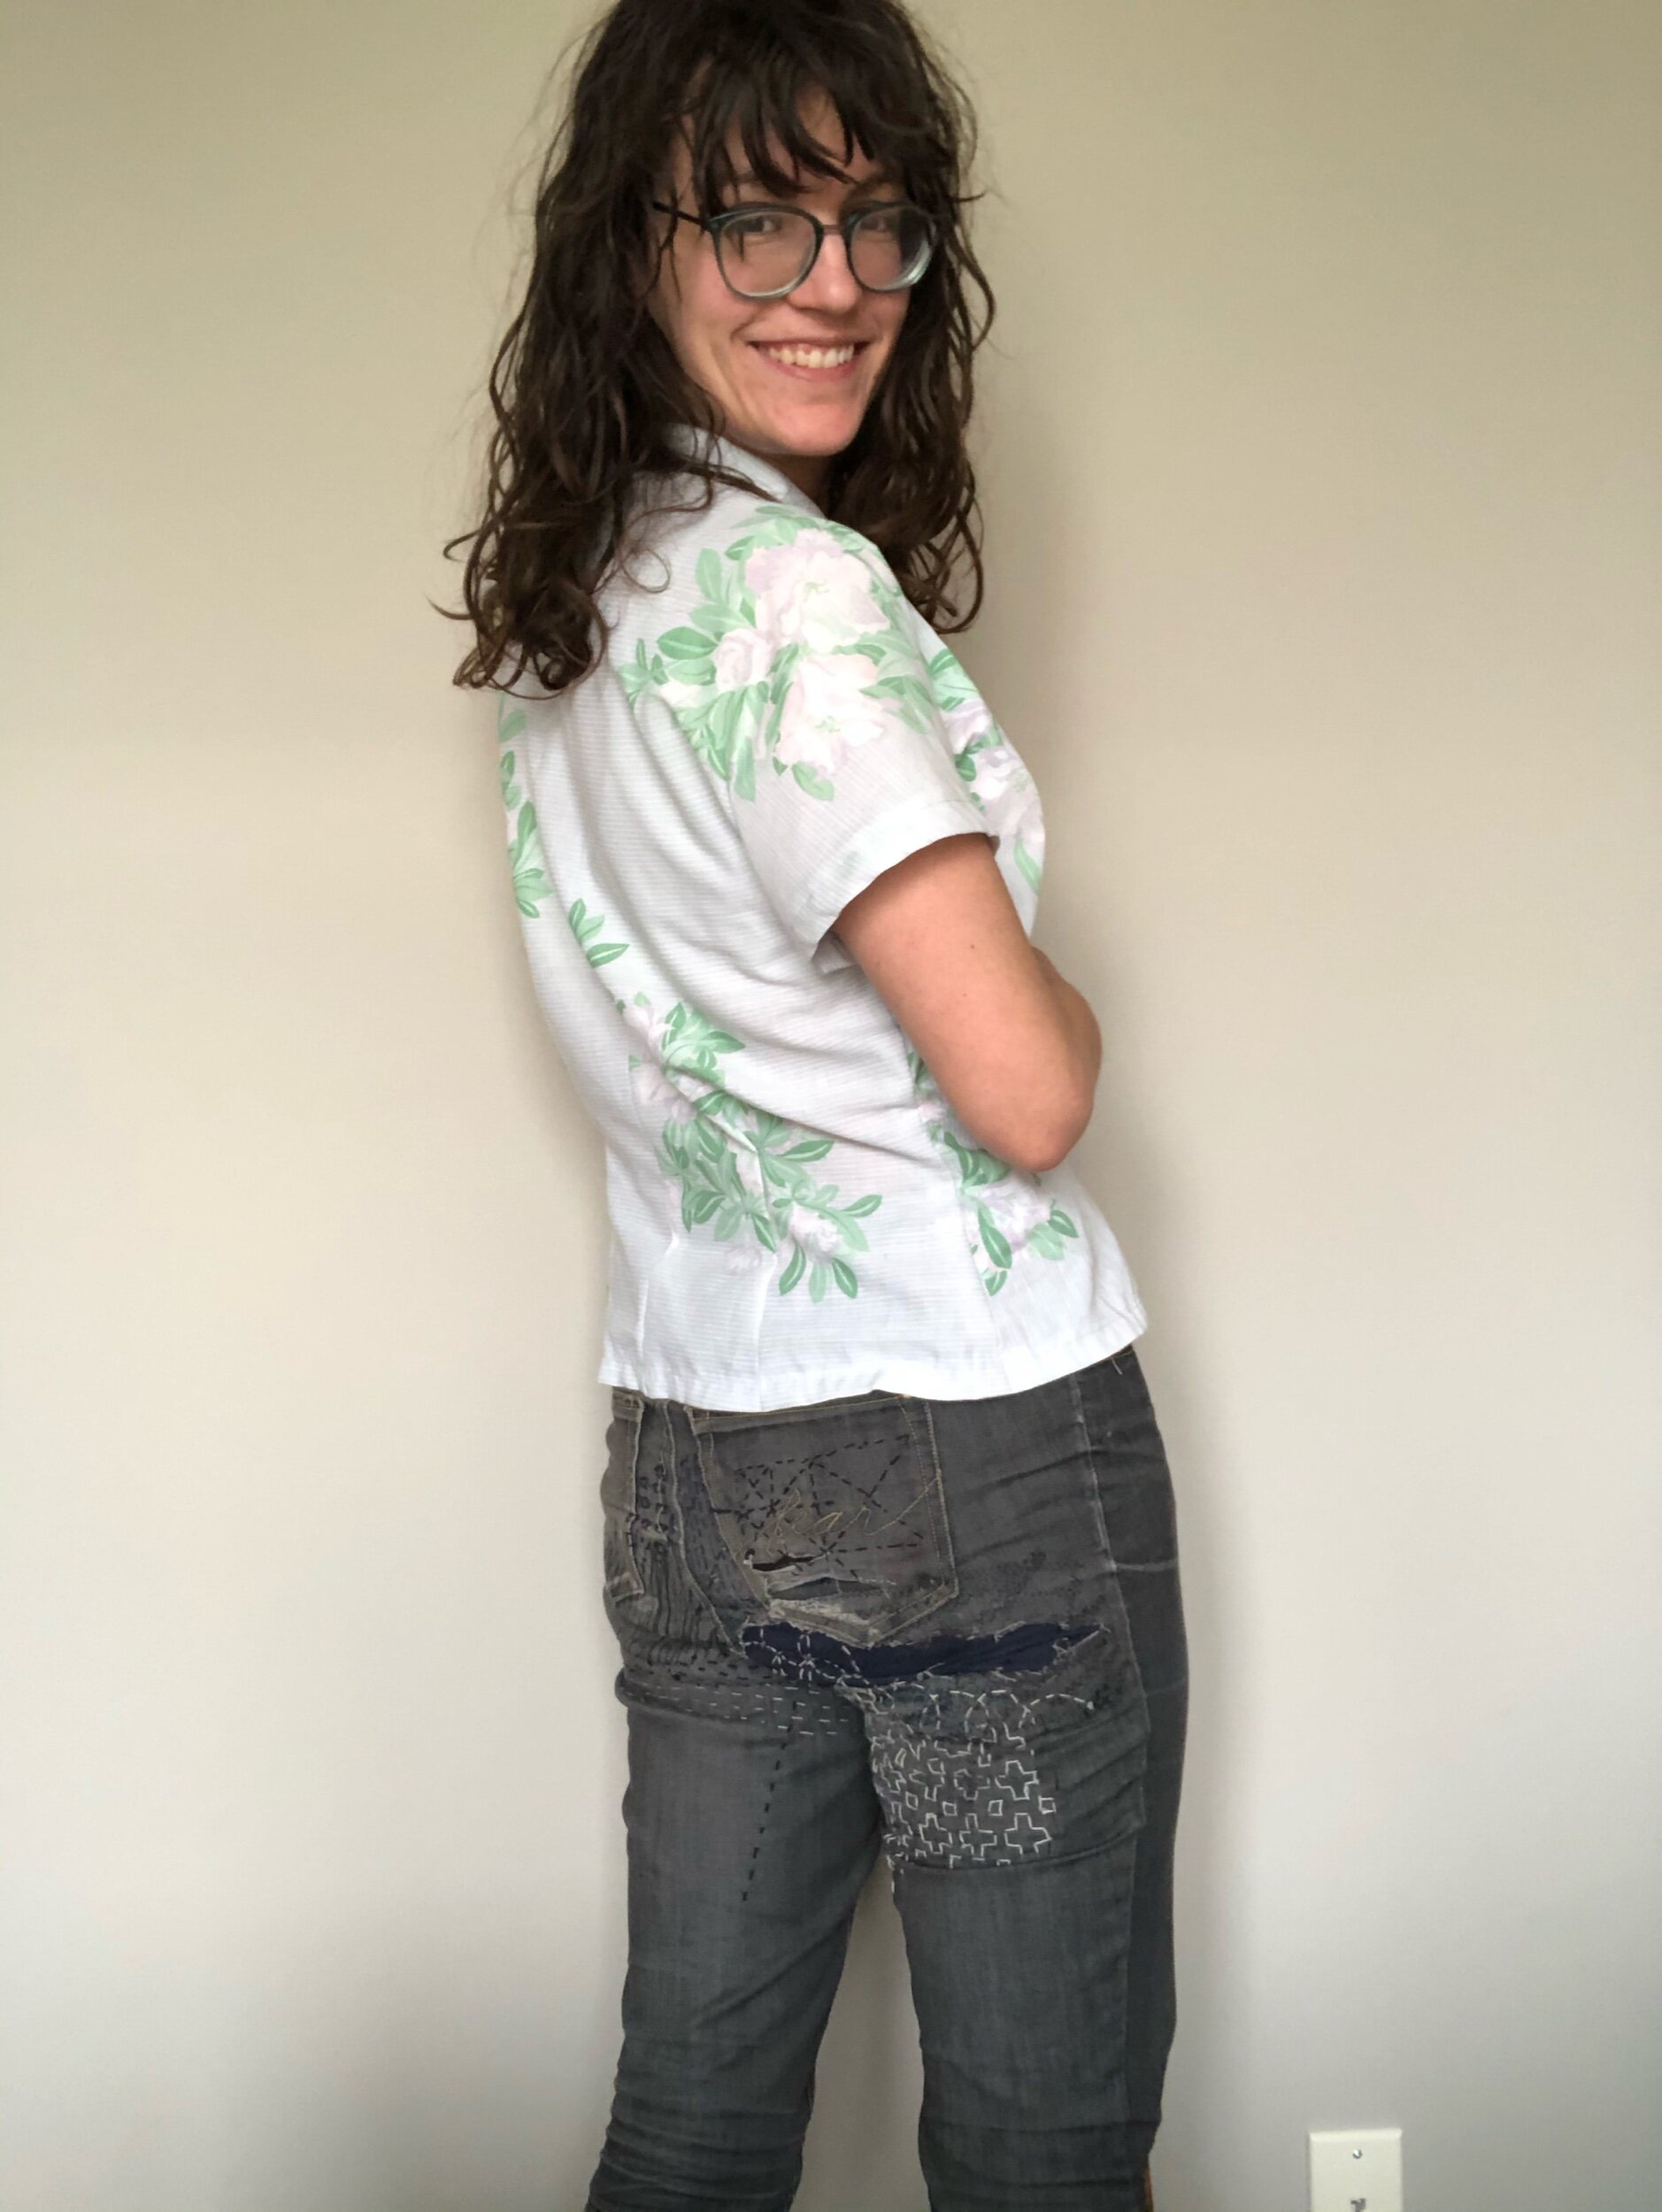
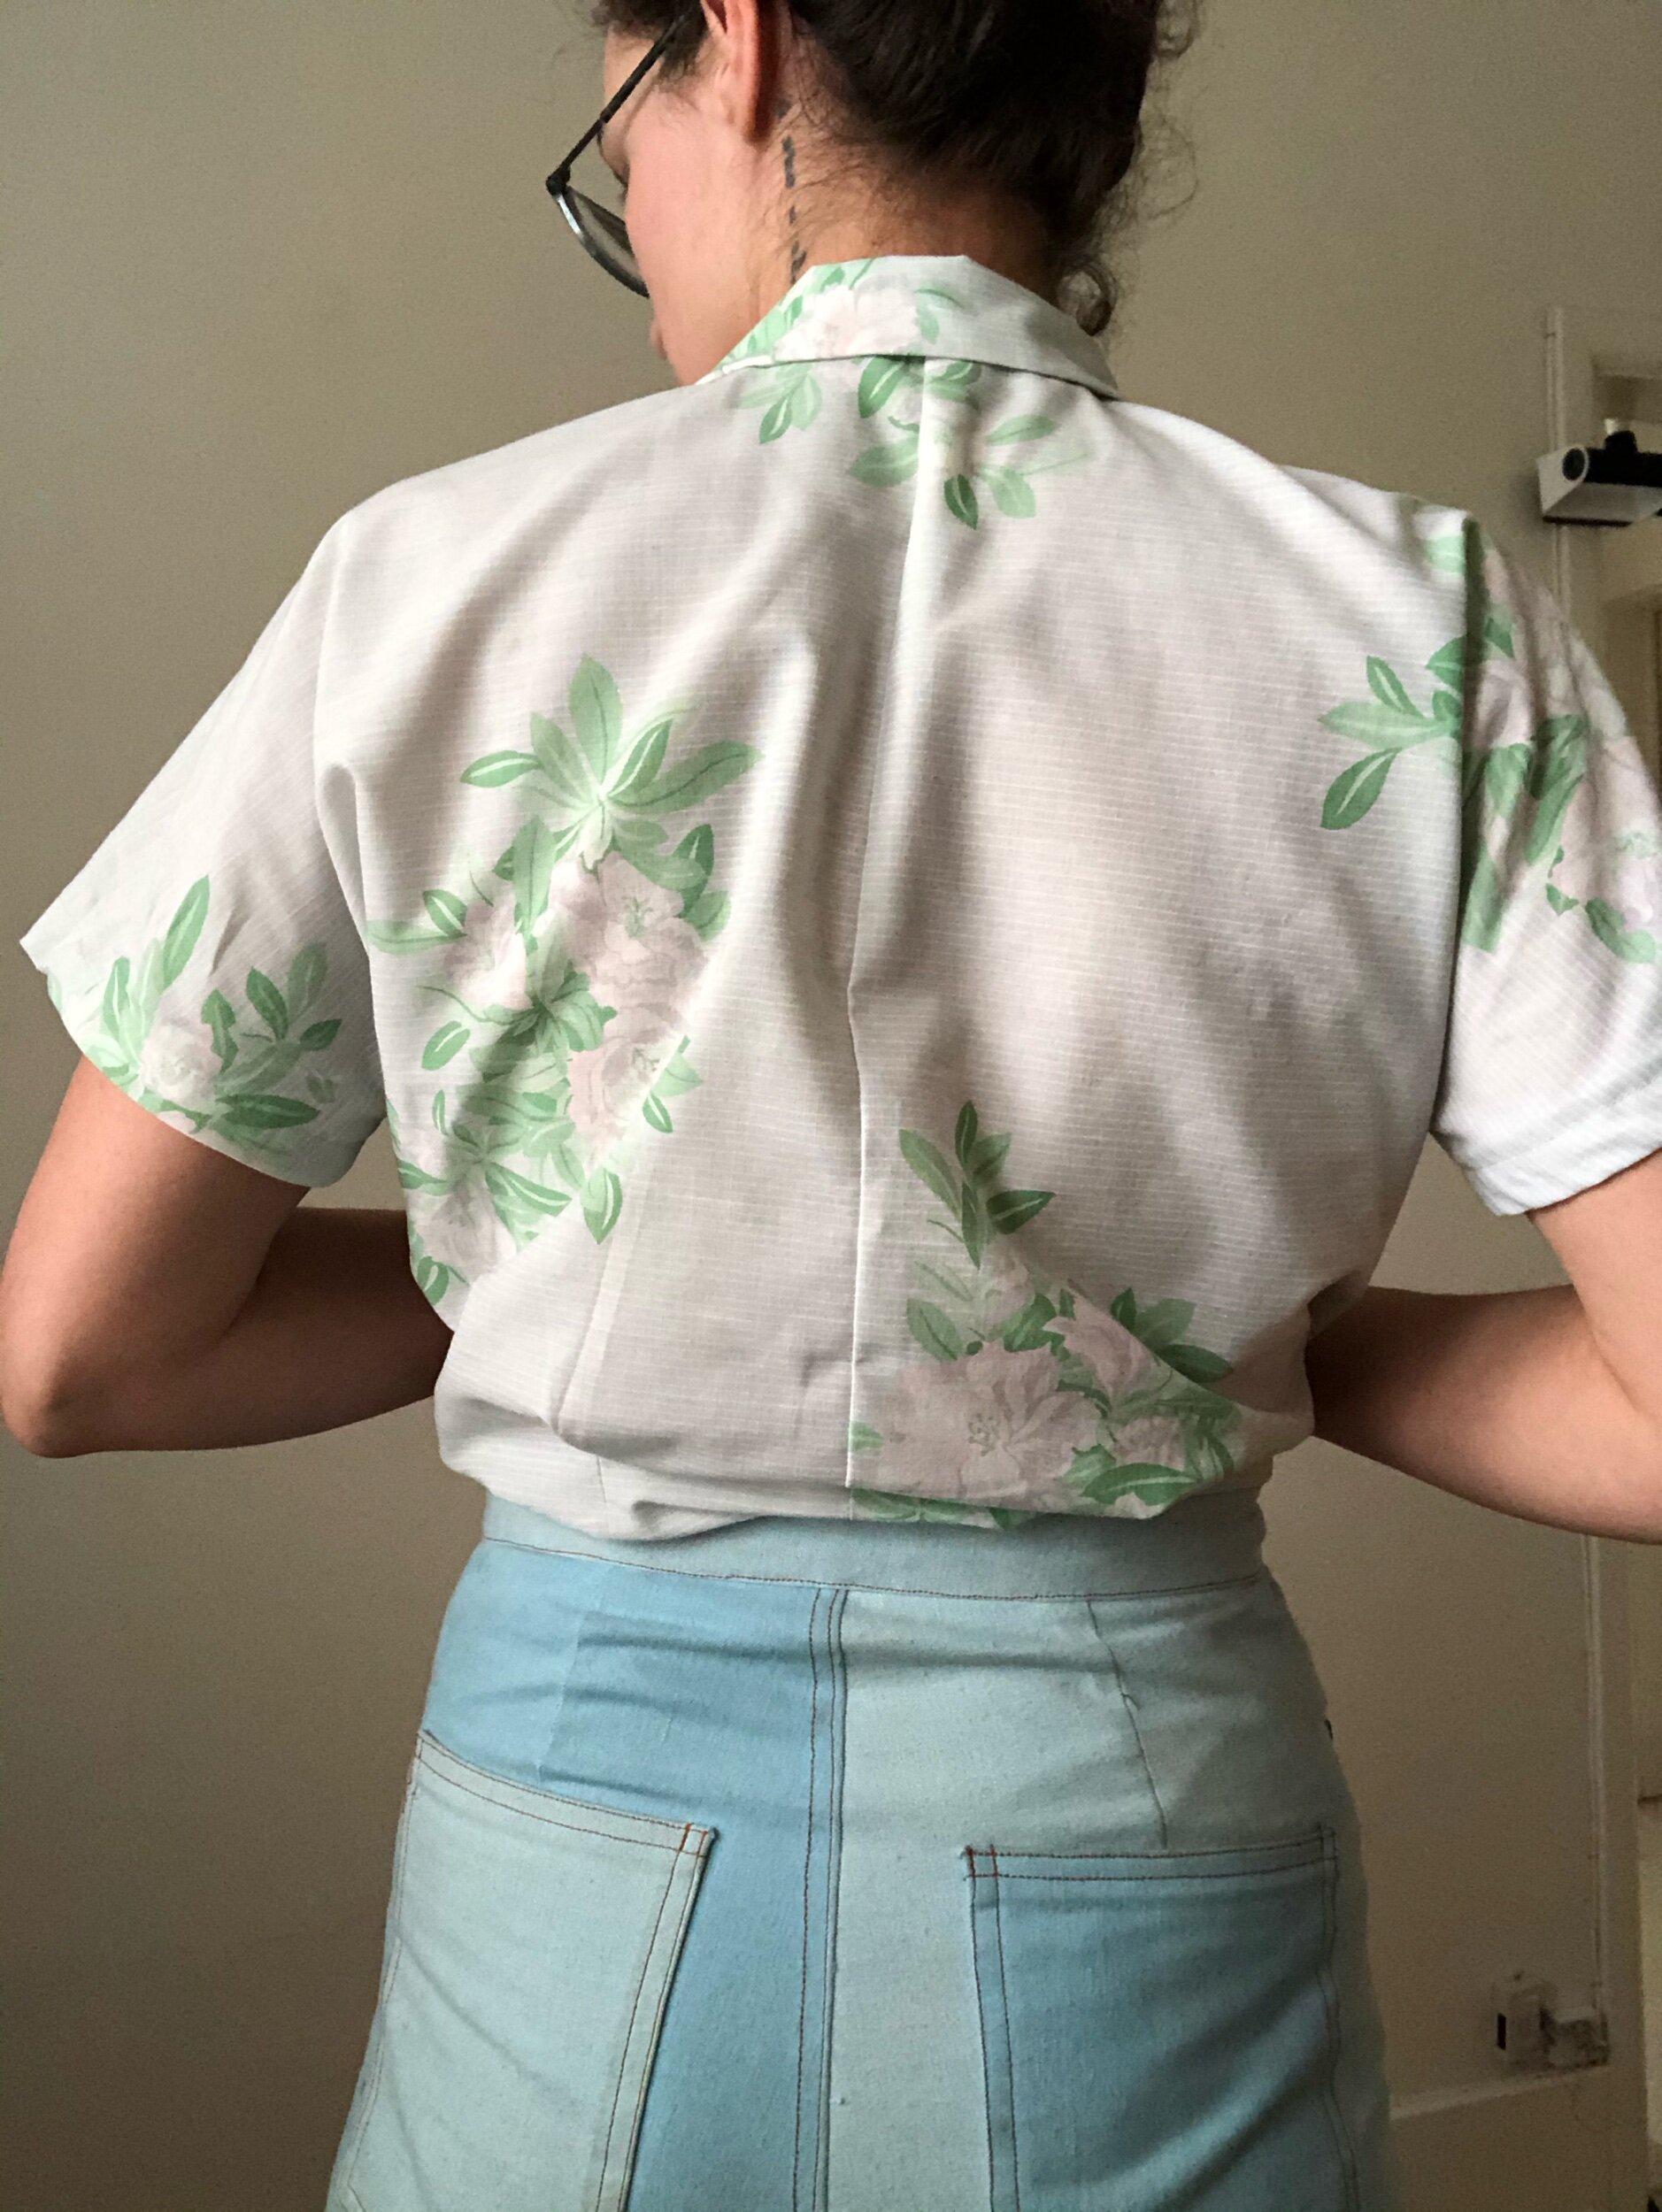
untucked rear view
I’ve been dragging feet between projects - I’ve started a WilliWear pair of pants that i’m quite excited for but a little nervous about. The dream is to create a pink pantsuit with my 80’s pink jacket, and while the patterns suit each other I do want to make sure they work together. There’s also the matter of the waistband, as I’ve been finding alllll of my pants waistbands want to scrunch and fold up, so I was waiting on ban-roll (sourcing 1.5 inch in a pandemic… sigh). Also dreaming of a sundress in lovely rayon challis, but i realized that the pattern i finally settled on after much debate (i don’t work with prints often enough and experienced a great deal of fear of “what if it isn’t perfect”) has a collar possibly not so suited to rayon challis’ floppiness, and am thus waiting on mail-order silk organza to see if that can solve it…
Which is all to say, I cut this pattern out on the side while thinking about these other project ideas, also thinking the rayon challis could be a great fit for this pattern (and i think it will find its way to this cute shirt in the end), but wanting to take the pressure out. Out of the envelope, it’s a bust 36, and given the forgiving fit and my last blouse’s success, I figured I could just put it together and hope for the best. And I used a cute thrift store bedsheet to really dial back the pressure.

On Thursday night, I assembled it. Stayed up a little later than preferred, but after 2 hours had a shirt - an unhemmed, buttonless shirt. (No construction photos… this was fun and fast.)
I really enjoyed putting it together, too. I didn’t interface SHIT (which seemed like an oversight but worked so who am i to argue with the pattern instructions). Or, I did throw in little scraps between the facing and the shirt where buttonholes and snaps needed to be. The front gathering was straightforward, just enough to give visual interest, but neither so much or so little that i was concerned about getting it just so.
And of course, the sleeve-front-back join was a new look at construction, which was the whole thing that originally drew me to the pattern among all of Clara’s. Essentially all that happened here was an angled join - where the front has a triangular front, so the back needs to be clipped right up to the seam to join on without wrinkles. It’s something I’ve read about and understood conceptually, but hadn’t ever done, and making it happen on such an interesting detail really made me happy. Now I’m ready for that Vionnet I’ve had my eyes on (lol).

The bedsheet deserves mention: I love the print. Stripes and huge florals. The back/sleeves I cut with the stripes horizontal, vertical on front, as I wanted the “yoke” to contrast. It needed no pressing to get rid of wrinkles and took the cotton setting on my iron without any complaint. It would not hold a press. I swear I pressed everything, used a clapper, etc… and everything just relaxed over time. But again, no need for pressing wrinkles, so I’ll forgive the soft edges.
The fabric is also relevant to how much I dislike facings as a finishing solution - the neckline facing just wants to flip itself out thanks to that not-holding a press. I tried stitching down from the right side along seam lines, but just ended up with irritated neck skin from where the facing’s edge was flipping up. This was somewhat easily solved- the real problem was that I’d finished the edge of the facing with a 1/4 inch fold secured by a zig-zag, and it became shockingly rough/stiff along the edge, hence the scratching.
The solution - understitching the seam allowance to the facing, but with a zig-zag to finish the edge, then trimming off as closely as I could to that. Instantly much more wearable! Still would prefer something a little less facing-y. Maybe a cut-on button placket and add a collar stand?

showing off that seamless top of shoulder as you do
I used sewing as motivation to get work done on Friday - if you get this story done, you can pick out buttons and do buttonholes. If you do this one, you can attach buttons. This one, you can do hems.
Work didn’t go as expected so it took until 2 before I got to pick buttons, but it happened. And I picked out a set of round shank buttons my brother loved, but I only had 4, so not enough for his shirt. Although now, I could only find three. So. The pattern marks out 4 buttons, but I made it work with 3 and snaps: one snap between the lower two buttons, then two below the waist (the pattern calls for one), which I just marked by poking with an awl as I was wearing it, then adding the kam-snaps then and there. I have sew ins, but I have so many more Kam snaps and they’re just so quick!

untucked front view (i like it tucked more, unsurprisingly as that’s what it’s designed for) but not all my jeans will work for that)
Buttonholes worked a treat with the little scraps under for support. Shank buttons so that was quick too.
For the hems, I veered from the pattern, which calls for bias along the sleeves and seam tape along the hem, with a hand finish. I went machine for both, skipping the bias in favour of a double folded hem on the sleeves, which were plenty long enough for that. On the hem, I did use some vintage rayon seam tape to cover the edge then turned up once and machined over it twice to secure, not as clean as the called-for finish but more modern and, vitally, faster!
Pattern: Vintage Butterick 7327
Size: B36
My Measurements: B36, W30
Fabric: mystery content bedsheet from thrift store
Worn here with: Philippa pants v1
Next time: Draft collar stand and button placket (cut on) to get rid of facings. Or do front facings but with a bias bound neck back. Would love to try in a rayon challis! Eliminate centre back seam
See another view made up
tucked in back, i love it
Worn irl